Amnezia VPN Manual
Amnezia VPN အသုံးပြုနည်း (Step by Step)
Admin ကပို့တဲ့ Key/Config ကိုသုံးပြီး connection တင်တဲ့လုပ်ငန်းစဉ်ကို screenshot နဲ့ အဆင့်လိုက်ရှင်းပြထားပါတယ်။
Admin ကပို့တဲ့ Key/Config ကိုသုံးပြီး connection တင်တဲ့လုပ်ငန်းစဉ်ကို screenshot နဲ့ အဆင့်လိုက်ရှင်းပြထားပါတယ်။
အကူအညီလိုရင် Telegram Channel နဲ့ Telegram account ကိုအောက်ကနေ တိုက်ရိုက်ဆက်သွယ်နိုင်ပါတယ်။
Admin ပို့တဲ့ message ထဲက header စာသားတွေပါအပါအဝင် block တစ်ခုလုံးကို copy ယူပြီး Insert key ထဲ paste လုပ်ပါ။ အရင် key ရှိပြီးသားဆို + ကိုနှိပ်ပြီး ထည့်ကာ server list မှာ နောက်ဆုံး (အောက်ဆုံး) key ကိုရွေးပြီးမှ Connect လုပ်ပါ။ အောက်ကနမူနာဟာ သင်ပေးထားတဲ့ပုံစံအတိုင်းဖြစ်ပြီး အရေးကြီး key တန်ဖိုးတွေကို hide လုပ်ထားပါတယ်။
✅ Success!
🖥 Server: RN2026awg
👤 Guide_key


[Interface]
PrivateKey = mL13l631NboGu+Qx...Bh8L7smiucMVA=
Address = 10.8.0.3/24
DNS = 1.1.1.1
Jc = 5
Jmin = 50
Jmax = 1000
S1 = 29
S2 = 146
H1 = 1122646375
H2 = 647241008
H3 = 2028640056
H4 = 1305840423

[Peer]
PublicKey = brRtxIwemgv3v1Qc...YwQizG4T6w3k=
PresharedKey = r/EAfqqwsw5f8r17...S3kZJZv4d0To=
AllowedIPs = 0.0.0.0/0, ::/0
PersistentKeepalive = 0
Endpoint = rn2vpn.truehand.online:51820

App ကိုစဖွင့်ပြီး Let's get started ကိုနှိပ်ပါ။
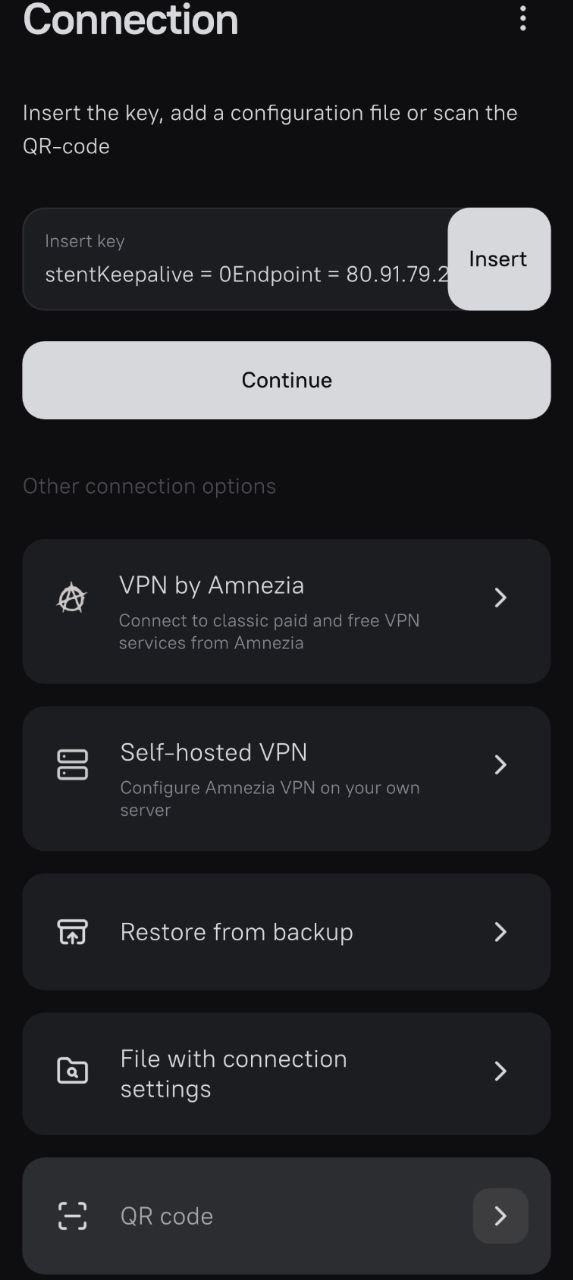
Insert key field ထဲမှာ admin ပေးထားတဲ့ key/config ထည့်ဖို့ပြင်ဆင်ပါ။
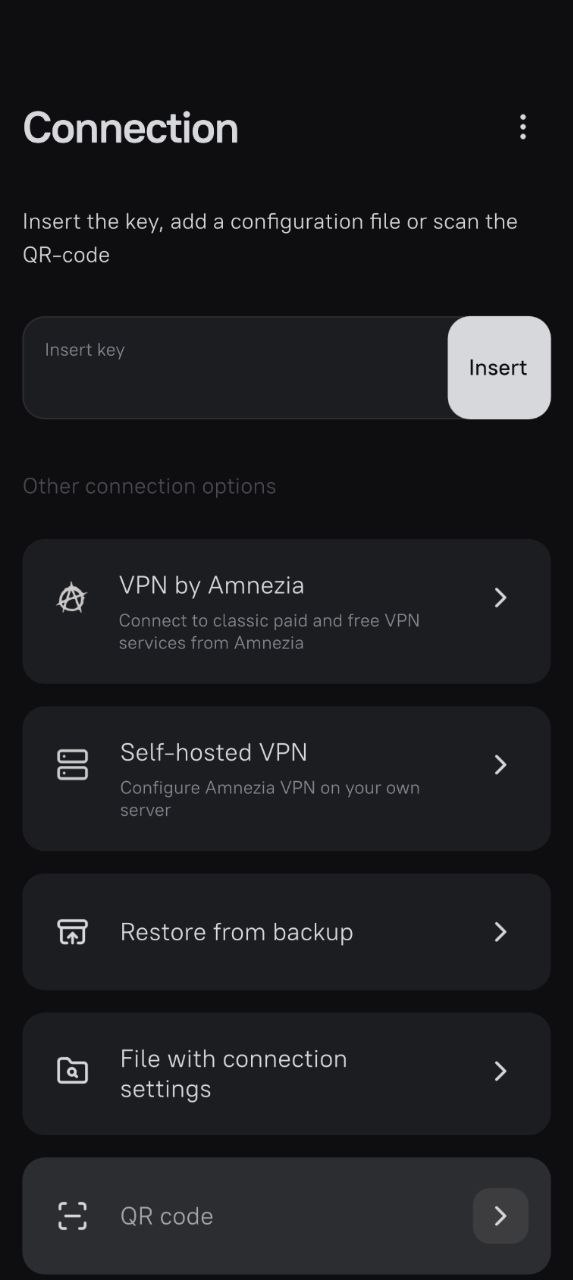
Admin ပို့ထားတဲ့ text key (သို့) config ကို paste လုပ်ပြီး Insert ကိုနှိပ်ပါ။
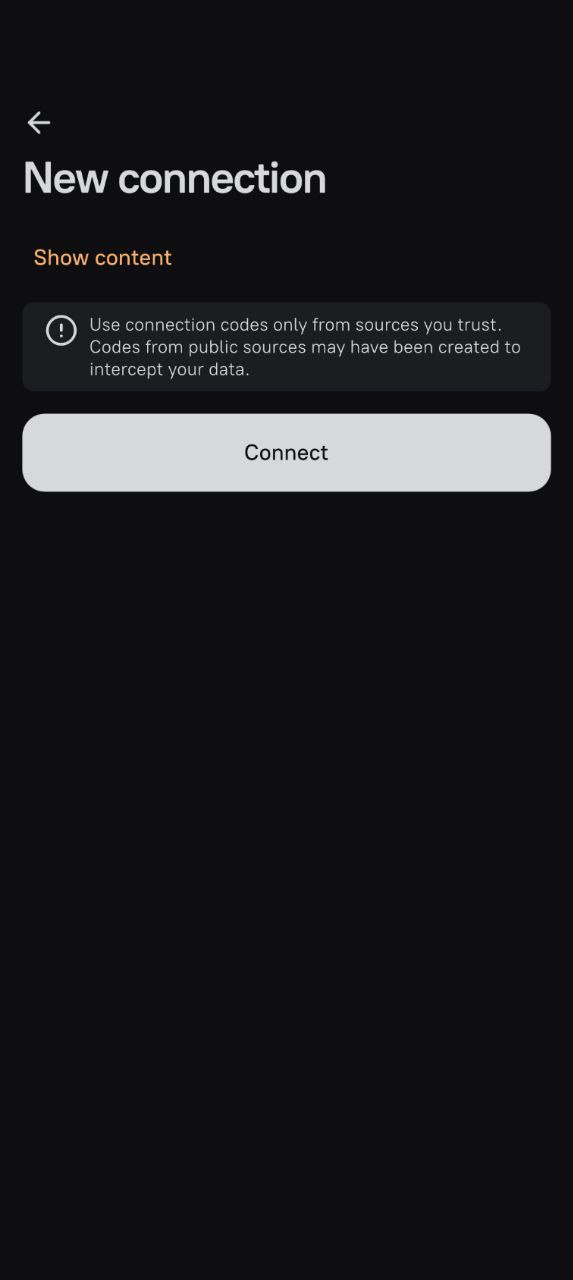
Key import အောင်မြင်ပြီးရင် Connect ခလုတ်ကိုနှိပ်ပါ။

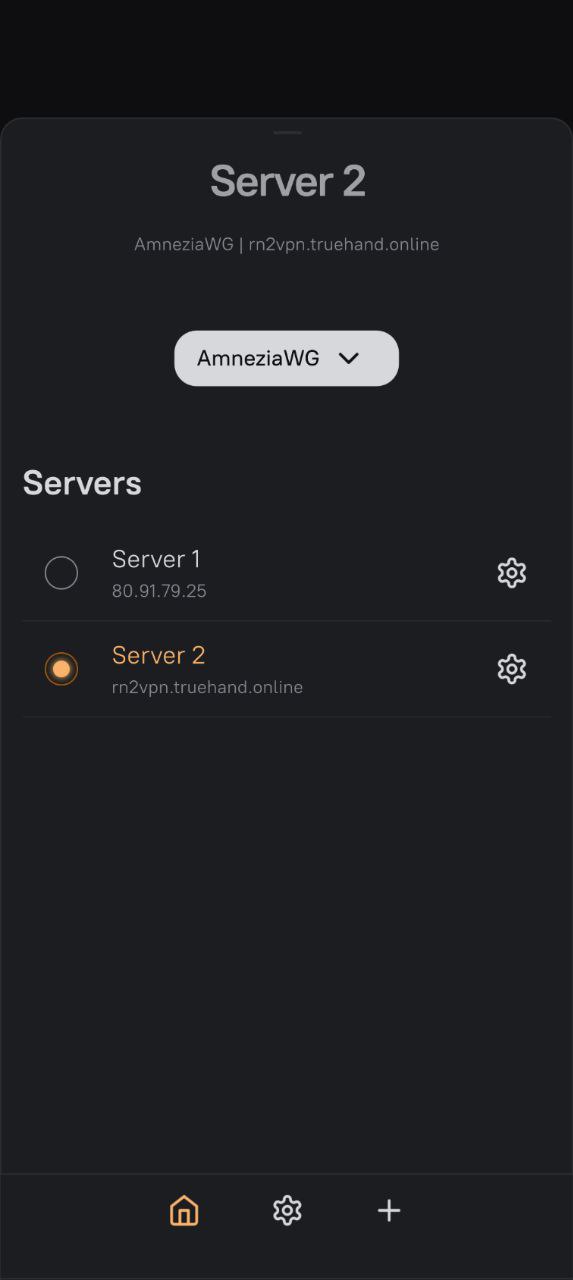
Server card (`Server 1`) ပေါ်လာလျှင် circle button Connect ကိုနှိပ်ပါ။
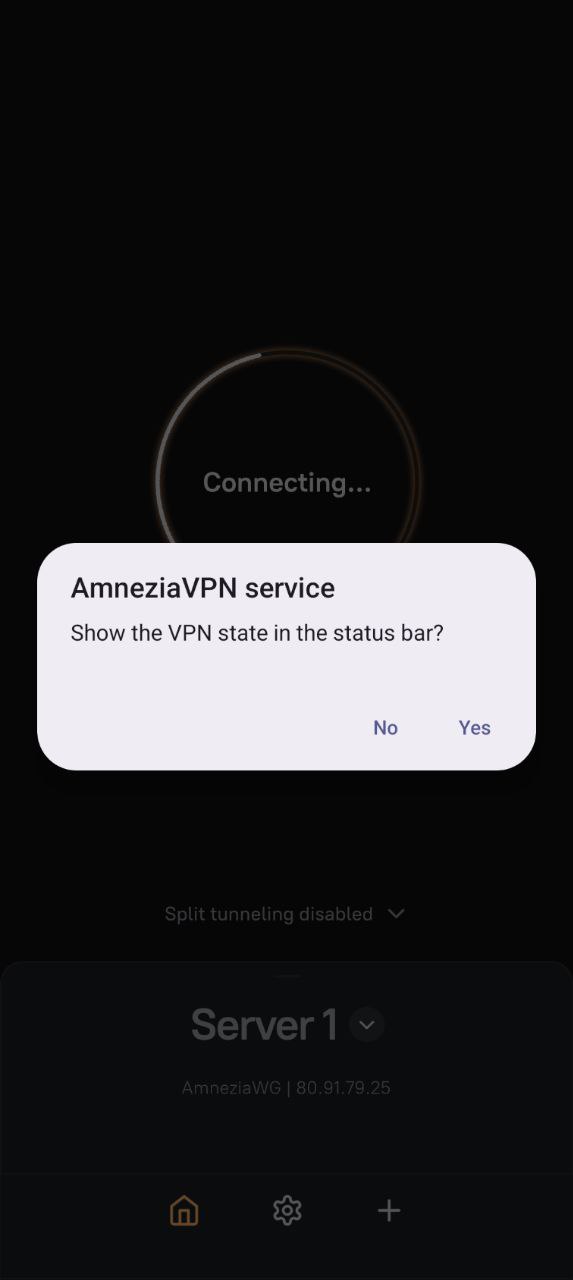
System popup ပေါ်လာတဲ့အခါ Yes ကိုရွေးပါ။ ဒီအဆင့်မလုပ်ရင် connection မတက်ပါ။
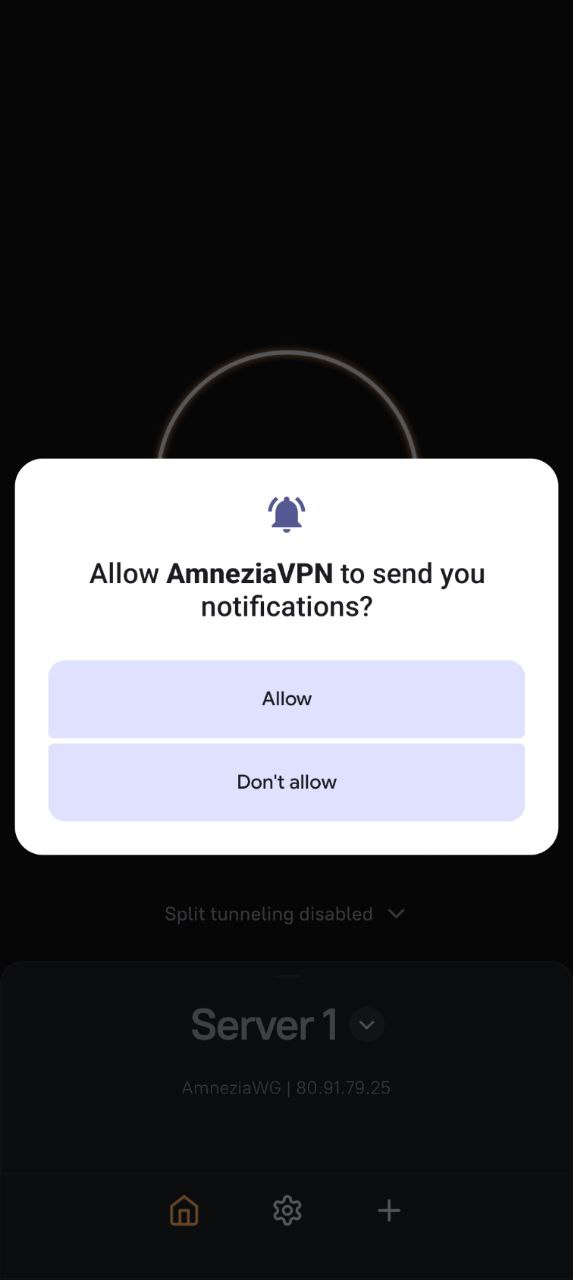
Connection status သေချာပြရန် Allow ကိုပေးပါ။
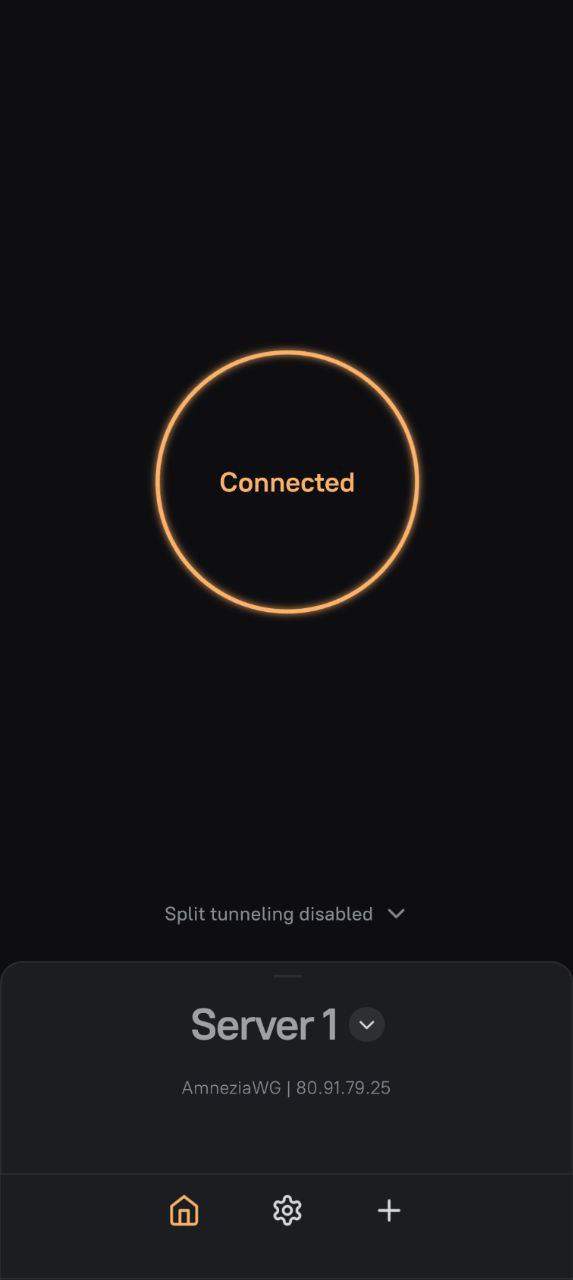
Circle ထဲမှာ Connected ပေါ်လာရင် VPN ချိတ်ဆက်ပြီးပါပြီ။
+ ကိုနှိပ်ပြီး key အသစ်ထည့်ပါ (အရင် key အသစ်ထည့်သည့် အဆင့်အတိုင်း)။ ထည့်ပြီးရင် server list ထဲက နောက်ဆုံး (အောက်ဆုံး) key ကိုရွေးပြီးမှ Connect လုပ်ပါ။